two new quick ones

I finished a top pre-sxsw but have not yet taken pictures. hoping the weather gets nice here so I can wear it locally.

I did finish two blocks for March (I joined a 2nd quilting bee) – so here they are!

This one is for the Moody Blues bee that I’m just starting..it was a difficult one only because I kept prematurely trimming the white bits. 12.5″ was my enemy on this one.

two new blocks & a finished quilt!

I finished up my February blocks for the Mod Stash Quilt Bee, and finally got around to finishing the binding on a quilt for my friend Susan who moved far, far away a few years ago, married a great guy, and bought a HOUSE!

Liberated Churn for MSQB

first of two squares for March!

This quilt is the Kitchen Window pattern from The Practical Guide to Patchwork, written by Oh, Fransson’s Elizabeth Hartman. I’m excited to try another of the patterns now that this is in the mail.

Kitchen Window

peek of the back

I tried not to use too many coordinating fabrics. The solid rust/orange color is a Kaffe shot cotton, which I’ve been all about lately. Did a pretty large stipple/free motion that makes it look nice and wrinkly after washing, also kinda makes it hard to see the prints in these photos…

mod stash quilting bee

Been doing a couple blocks every month for the Mod Stash Quilting Bee. I’m really loving it! So much fun to just try out one block, then move onto another format.

For January – a Bento Box, and an Improv Block with yellow/black/gray/white:

The Bento block obviously isn’t cut yet. Excited to see how all of these quilts come together!
Our second for February is the most complex by far: a Liberated Churn Dash. Even the name is complicated! It doesn’t seem that hard, though… hoping to take a stab at it later this week and then start thinking about what kind of blocks I want to receive when it’s my month in April!

Almost done with a gifty quilt for a friend of mine. I’ll post photos when it’s finally done!


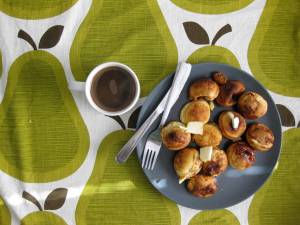
Mid-day Ebelskivers!

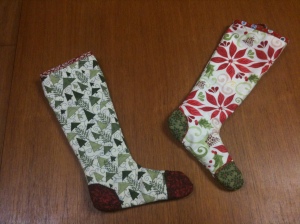
Merry Christmas Stockings

Christina had the great idea to make new stockings for her & her husband. She always decorates their house for the holidays but haven’t had Christmas stockings since moving away from home. We used a pattern from Stitched in Time that’s free on the Craft blog.

We used three coordinating prints per stocking and included a layer of batting between the exterior print & lining. This bulked them up a little and made the stockings a little narrower than ideal but they’re still really cute and have space for plenty of stocking stuffers. I added a 1/4″ seam allowance to the pattern but if I were to do it over with the batting, I’d extend this to make room for some of the batting bulk.

These were super-simple to make, even with all the blanket stitch around the toe & heel patches. I think they’d look even better with some machine quilting all over.

I’m finishing a little baby blanket for my new niece and the table runner for my sister has yet to be quilted! Falling behind at the first of December!

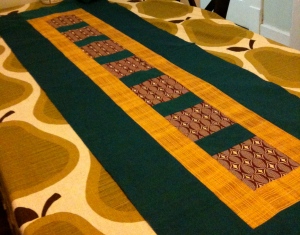
The Table Runner

I have been so bad at tracking my projects, and that’s made for a very boring blog. As you can see, my main problem is taking PHOTOS! I know that’s what stopped me from posting in the first place. Promise to try harder!

This is a table runner for my sister, in my dimly lit (romantic?) dining room. I used blue shot cotton, a gold stripe for the inner border, and a neat geometric purple and white print in the center. No pattern, just figured out how long I wanted it (52″ x 16″ wide) and chopped it down from there. I’m still deciding how to quilt it — Got some suggestions in the Free Motion Quilting Class last night, but we’ll see how those pan out!

There are so many gift tutorials on all the blogs lately – I love sewmamasew’s themed groups – but I’m still having a hard time deciding what to bring to my family’s gift exchange. I do have some mitered napkins ready for the cutting mat, and I promise to take at least 1 acceptable photo in a timely manner!


I’m here, I swear!

It’s been a few months, and my sewing has slowed considerably. But I DID complete a few new things in time for an early-June trip to California: A pink seersucker version (for myself this time) of Simplicity 2591, and Burda 05-2010-114 tiered mini dress.

For this dress I used a Kaffe Fasset cotton print from Mulberry Silks, that’s a small enough print with that good rose tone that seems to be good for my skin tone:

I left out the zipper but kept the buttonholes, and lengthened the front bodice piece at the top and bottom for a little more coverage.

This dress was incredibly easy to make, and with our insanely high temperatures this summer I’m hoping to make this again.

Photos of both of these projects coming soon! Off to New York this weekend.. maybe there will be some time for the fabric shops?

Fitting Shell: Worth the $4

McCall was having a $3.99 sale on their website so I finally bought the fitting shell that I believe is online-only. I only tissue-fitted the bodice last night, but within a few minutes I finally realized where some things go wrong in my sewing! I have sloping shoulders, which causes the extra fabric between my bust and shoulders (you can kind of see it in the shirt dress photos). Easy re-drawing of lines in two places and it fit SO MUCH BETTER! Even with just tissue paper! This one simple change, plus noting that I have a high waist and a lower apex, has made me so much more excited about trying new, fitted patterns.

Fit for Real People shows how you can take your fitting shell and create princess seams and a load more — I’m eager to take my basic shell and make something new from it. I also finally got The Sew U Guide to Making a Girl’s Best Frock, which has great ideas about changing basic dress patterns into new dresses with lots of personality. The book seemed a little light on changing for fit, so these two books work perfectly together.

We’re expecting a large shipment from fabric.com in the next few days — bought 6 new patterns for SXSW & Spring wardrobes (not all to become clothing for me, but still sewing practice time for me)!

Burda 05-2009-126 Shirt Dress

It snowed here yesterday so I had two full days stuck at home, which never happens. I started this dress last week but was moving really slowly on it, so staying home made me face it and get it done.

I saw a similar shirt dress at the Gap last month and figured I should try this style out, but wasn’t feeling all the shades of brown and tan at the fabric store, so I got this teal stretch poplin instead.

This dress has shoulder tabs, cuffed sleeves and sleeve tabs, patch pockets with tabs that become beltloops, and back tabs for belt loops as well.

I went up to a size 40 at the hips but something happened (aka I wasn’t paying attention) and didn’t actually go to a size 40 on all the pieces.. I tissue-fit the pieces before I cut fabric, and it fit fine, so I didn’t go back and re-trace. I probably should have for a little bit of ease, but oh well.

Another thing that happened in my haste was that I cut one of the panels about 3″ too short. So, byebye 1 5/8″ hem! I did a narrow hem instead. No big deal. It’s definitely above the knees, but not too short.

My birthday is this week and if it were just a little warmer, this would be a good birthday dress! Maybe I have time before the snow melts to make another outfit — better suited to the weather.

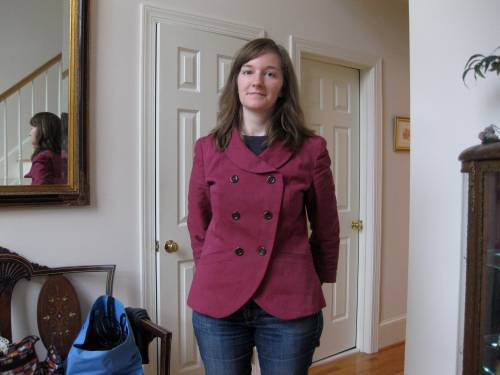
Simplicity 2810 double-breasted jacket!

This is a Project Runway pattern from Simplicity – this is the only view with the double-breasted look. There are always so many jackets in Burda that I think about making, but I wanted to first make a jacket from Simplicity, McCall’s, etc, so I could get the basic idea down before jumping into the world of terribly vague directions and zero diagrams.

I used basic twill from Hancock’s and cotton/poly broadcloth for the lining– it’s chocolate brown. The combo reminds me of chocolate dipped raspberries, but not as decadent.

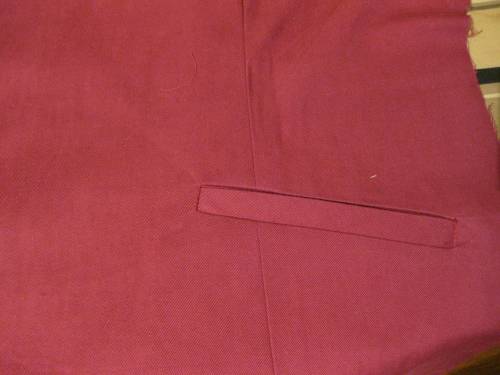
This was also the first time I tried welt pockets. This was never something I was scared to do, but never had the patience to practice it before the pocket step came on whatever I was working on, so that’s usually why I skipped it. It went pretty smoothly, though I think I can definitely improve on the next one I try.

Project Runway directions…I can’t stand how they make you jump around between steps! The way that they separate the sections did not work for me. I was scanning four full pages each and every time I picked up the jacket to get an extra step done before heading to work.. it drove me crazy. Also, yardage requirements: I only needed 2 1/4 yard, as opposed to the 3-some that doing the math told me to buy.

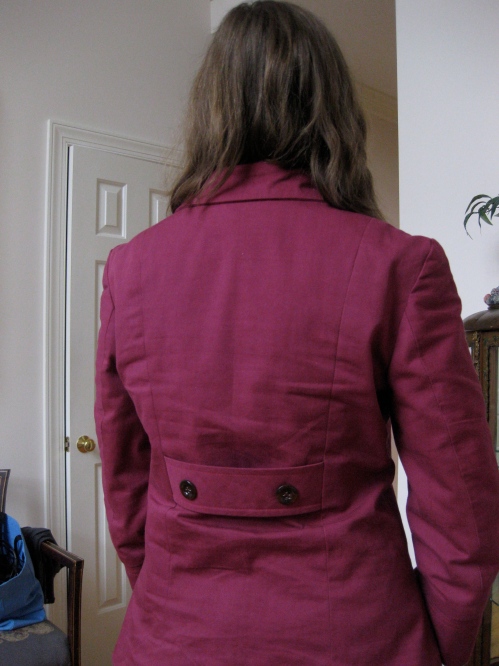
The back tab:

The fit straight from the muslin was pretty good, though I added length to the body & sleeves, and took a smaller seam allowance on the upper and lower sleeves and body sides — the arms were really tight, as the pattern reviews noted.

More photos on Flickr.